Vibrato / Chorus
- May 21, 2021
- 4 min read
This is the most complicated effect to set up, but it will be very useful to create vibratos, choruses and modulated delays, and you only need to set it up once!
The GUI-provided chorus effect leaves much to be desired. It doesn't modulate. The flanger object would be a good replacement for it (running after a delay for example) but it's not possible to remove the dry signal. Thankfully 'MarkT' has contributed this excellent open-source vibrato code that we can copy into a new library file to run in our sketches. (promote their other stuff)
Follow this step-by-step guide to save the vibrato code into your library:
(you will have already done this if you followed the "Creating Libraries" guide)
First create a new sketch in the Arduino IDE (File -> New)
In the top right of the IDE you'll see a drop-down arrow under the magnifying glass, click it, and click 'New tab'.
In the box that appears, type "vibrato.h", then click 'OK'. This will be the header file that will accompany the ".cpp" library file you're about to create.
Open this link to MarkT's vibrato code, and find the two embedded code boxes in the top comment called vibrato2.h and vibrato2.cpp. (Further down the page you'll see "accurate" vibrato libraries, but I actually prefer the first one).
Copy the entirety of the first code sample (the one called ".h", in the first embedded box) into this new tab, deleting everything that was there previously.
Click back to the first tab that opened in the IDE, probably named "sketch_(today'sdate)", under the upload and verify buttons.
Copy everything in the second embedded box (".cpp") from MarkT's comment into this tab, deleting everything that was there previously.
Next you'll need to check what your "sketchbook directory" is, this is the location on your device that your sketches are saved to. In the IDE, go to File -> Preferences -> Sketchbook location. It's probably "...Documents/Arduino" but t's good to make sure.
Now save the sketch you just created (File -> Save). Make sure the sketch is being saved in your sketchbook directory. There is another folder called "libraries" in "Program Files x86" (on Windows). You need to make sure you save the sketch in the correct "libraries" folder in "Documents" - assuming that's what your sketchbook directory is - and not the Program Files x 86 one. Name the sketch "vibrato.cpp" and save it.
Open File Explorer on your computer and navigate to your sketchbook directory, then open the "libraries" folder. You should now see a new folder called "vibrato.cpp". Open this folder and check that you have two files, "vibrato.h" and "vibrato.cpp". If the latter appears as "vibrato.cpp.ino", rename it by removing the ".ino". Click "OK" if a warning pops up.
You just created the vibrato library. Nice one, Cyril. Follow this guide to use the vibrato object in a sketch:
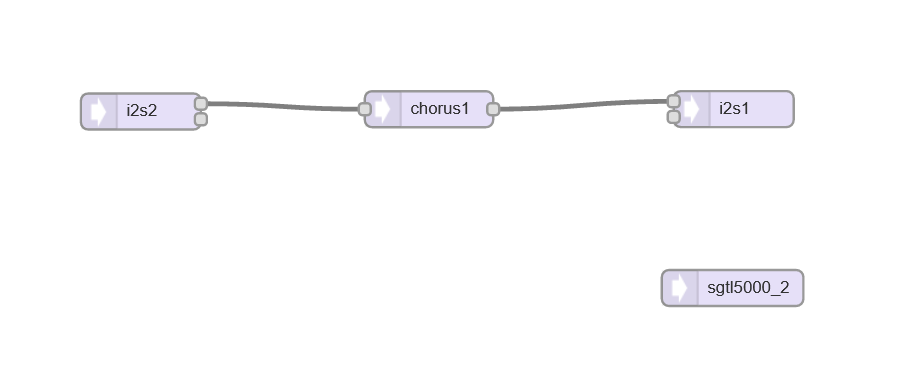
The vibrato object won't appear in the GUI, so you have to use a temporary replacement for it when creating an effects chain. I like to use the chorus object:
Export the GUI generated code and paste it into your sketch (or the template sketch[LINK]).
Look through the code you just copied in and find where its says "AudioEffectChorus chorus1; "
Delete this line and replace it with "AudioEffect_Vibrato vibrato1;"
Look through the same copied-in code for the other instances where the chorus object is mentioned, probably written as "chorus1". There will be as many mentions of it as there are patch cables (connections in the GUI) attached to it. Rename each of these to "vibrato1".
Finally, add this code at the very top of your sketch to include the new vibrato library in your code:
#include <vibrato.h>using the example in the picture above, the GUI generated code should now look like this:
#include <vibrato.h>
#include <Audio.h>
#include <Wire.h>
#include <SPI.h>
#include <SD.h>
#include <SerialFlash.h>

// GUItool: begin automatically generated code
AudioInputI2S            i2s2;
AudioEffect_Vibrato      vibrato1;
AudioOutputI2S           i2s1;
AudioConnection          patchCord1(i2s2, 0, vibrato1, 0);
AudioConnection          patchCord2(vibrato1, 0, i2s1, 0);
AudioControlSGTL5000     sgtl5000_2;
AudioControlSGTL5000     sgtl5000_1;
// GUItool: end automatically generated cod
Now the vibrato object is hooked up and ready to use, you just need to run the function to get it going:
The vibrato function looks like this:
vibrato1.modulation(float hertz, float percent); It accepts two float values, the first controls the vibrato rate and can be any number between 0.5 and 20. The rate will then be set to this number in hertz.
The second is the vibrato depth and can be any number between 0 and 10. This is the percentage for how intense the vibrato is.
If you pass a number outside of these two ranges into the function, it will automatically round that number up or down to fit within the range.
Full Stereo Vibrato Sketch
A0 = Rate, A1 = Depth
You probably already know this but you can easily create a chorus from a vibrato simply by blending in some dry signal :)
#include <vibrato.h>

#include <Audio.h>
#include <Wire.h>
#include <SPI.h>
#include <SD.h>
#include <SerialFlash.h>

// GUItool: begin automatically generated code
AudioInputI2S            i2s1;           //xy=458,342
AudioEffect_Vibrato      vibrato1;
AudioEffect_Vibrato      vibrato2;
AudioOutputI2S           i2s2;           //xy=867,346
AudioConnection          patchCord1(i2s1, 0, vibrato1, 0);
AudioConnection          patchCord2(i2s1, 1, vibrato2, 0);
AudioConnection          patchCord3(vibrato1, 0, i2s2, 0);
AudioConnection          patchCord4(vibrato2, 0, i2s2, 1);
AudioControlSGTL5000     sgtl5000_1;     //xy=884,487
// GUItool: end automatically generated code

void setup() {
  AudioMemory(20); // the "40" will vary depending on your effect, eg. a delay effect will require more memory .... (HOW MUCH?)
  sgtl5000_1.enable(); // this turns on the SGTL5000, which is the audio codec on the audio board
  sgtl5000_1.volume(1);  // this sets the output volume (it can be between 0 and 1)
  sgtl5000_1.inputSelect(AUDIO_INPUT_LINEIN); // selects the audio input, we always use Line In
  analogReadResolution(12); // configure the pots to give 12 bit readings
  pinMode(0, INPUT_PULLUP); // internal pull-up resistor for footswitch
  pinMode(1, INPUT_PULLUP); // internal pull-up resistor for toggle
  pinMode(2, INPUT_PULLUP); // internal pull-up resistor for toggle
  pinMode(3, OUTPUT);       // pin 3 (the LED) is an output;
  Serial.begin(9600);       // initiate the serial monitor. USB is always 12 Mbit/sec
}

float rate = 1;
float depth = 5;

void loop() {

  rate = analogRead(A0) / 200;
  depth = analogRead(A1) / 400;
  vibrato1.modulation(rate, depth);
  vibrato2.modulation(rate, depth);
}
Adding new libraries this way is easy once you know how. You can now browse the internet for other interesting Teensy-compatible audio objects to run with your effects chain. Take "effect_tape_delay" by BleepLabs here for example.


Comments